Empowering teams with verified data
Airtable
8 min read

Empowering teams with verified data
As your organization expands, it's essential to differentiate between accurate, trusted data and ad hoc, work-in-progress, or unvalidated data.
Failure of your team to distinguish between these data types can result in inconsistent or redundant data, accidental misuse of inaccurate data, or even data security risks due to the unintentional sharing of sensitive details.
Verified data is a way for your team to instantly distinguish between these types. In Airtable, it promotes a collaborative approach to making trusted data visible and accessible for connected app building, empowering teams to work efficiently and securely while driving better business outcomes.
What is verified data?
Verified data, marked by a "Verified" badge, are data sets that have been vetted and approved by an administrator within your organization. These data sets are considered reliable, up-to-date sources, and are recommended for use in critical business workflows and decision-making processes.

Before a data set is verified, it's first published by an Airtable builder, making it available for team members to view and use. Both published and verified data sets can be found in the data library, offering easy access to everyone in the organization.
Enhancing collaboration: Verified data's impact on your team
Publishing and verifying data sets benefits teammates throughout your business, from Airtable administrators to your leadership team.
With verified data:
- Airtable builders now have the confidence that the apps they create with verified data use reliable, up-to-date data sources. They are empowered to contribute and publish their own data sets that can connect and benefit the business.
- Administrators gain more visibility and control over data sets critical to the company. They can safely empower any team within the organization with vetted data, while also allowing them to proactively spot potential data vulnerabilities.
- Leadership can rely on Airtable as a solution that unites, focuses, and accelerates cross-functional work by balancing the governance and accessibility of critical data.
This guide will walk you through how your team can work together to publish, verify, and use data throughout your organization.
How to use verified data across your organization
Key roles and responsibilities
To use verified data in your organization, you first need to assign specific roles and responsibilities to Airtable builders and administrators. These roles are crucial for identifying valuable data sets, maintaining quality, and mitigating risks with verified data.
Airtable builders: Data owners and data users
Builders create apps that seamlessly connect their team and organization's workflows, using essential company data. To successfully implement verified data, your organization should think about the different ways your builders use data.
Data owners: These builders have domain expertise across your business, and play a crucial role in identifying and publishing valuable data sets—which they can own and maintain. When data owners submit these data sets to Airtable's data library for admin review and verification, they help foster trusted data collaboration throughout the organization.
Data users: On the other hand, data users are builders who incorporate verified data sets into their apps, choosing shared, trusted information sources from the data library.
Both types of builders contribute to efficient and accurate data management within your organization.
Pro tip:
Remember that individuals within your organization may assume different responsibilities. For instance, a builder could serve as both a data owner and a data user, leveraging their expertise to manage and utilize verified data effectively. Alternatively, they might solely focus on being a data user.
Administrators
Administrators play a vital role in managing and maintaining the quality of the data sets published and used by the builders across your organization. They review and verify published data sets from data owners; evaluate their accuracy, uniqueness, sensitivity, and relevance; and monitor usage and adoption. Administrators ensure teams use only accurate, reliable, and relevant data sets, promoting efficient workflows and data-driven decision-making.
Now that we've covered the roles and responsibilities, your team can follow this three-step process to adopt verified data throughout your organization:
- Data owners publish data sets to the data library
- Administrators review data sets and decide whether to verify
- Encourage organization-wide understanding and usage of verified data sets
Step 1: Data owners publish data sets to the data library
A data owner must first publish a data set to the data library before an administrator can verify it. When choosing which data set to publish, a data owner should consider the following questions:
- Is the data set valuable and relevant to your team or business? Data owners should publish data sets useful to others in the organization. These might be relevant only to your immediate team (such as a bug tracker data set for engineers), or be more broadly relevant (such as company-wide OKRs data). Consider applicability, current demand, and the likelihood that the data set will continue to be useful in the future.
- Is the data set complete and up-to-date? As the data owner, you'll want to ensure the data set's accuracy, reliability, and comprehensiveness. Prepare to maintain the data over time.
- Can you provide relevant context on how other builders should use this data? Before they publish a data set, data owners should create concise and informative descriptions, including any necessary context, definitions, or explanations that will aid your teammates in comprehending the data set's purpose.
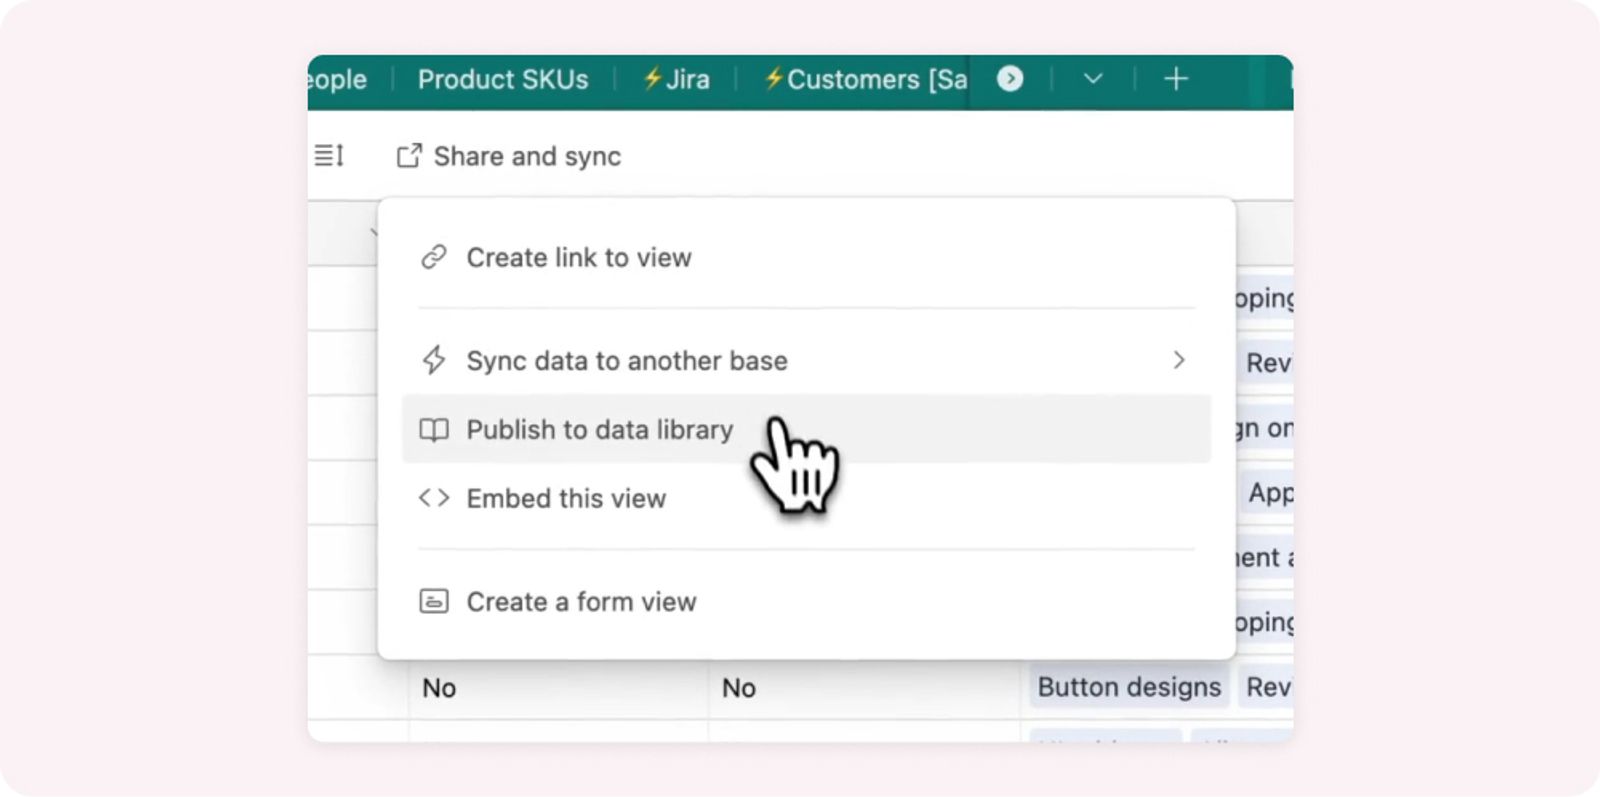
1. Create a data set
Imagine you have a data set that will be useful to others in your organization, such as a table that lists all of your employees. To share it, click "Share and sync" and select the "Publish to data library" option.
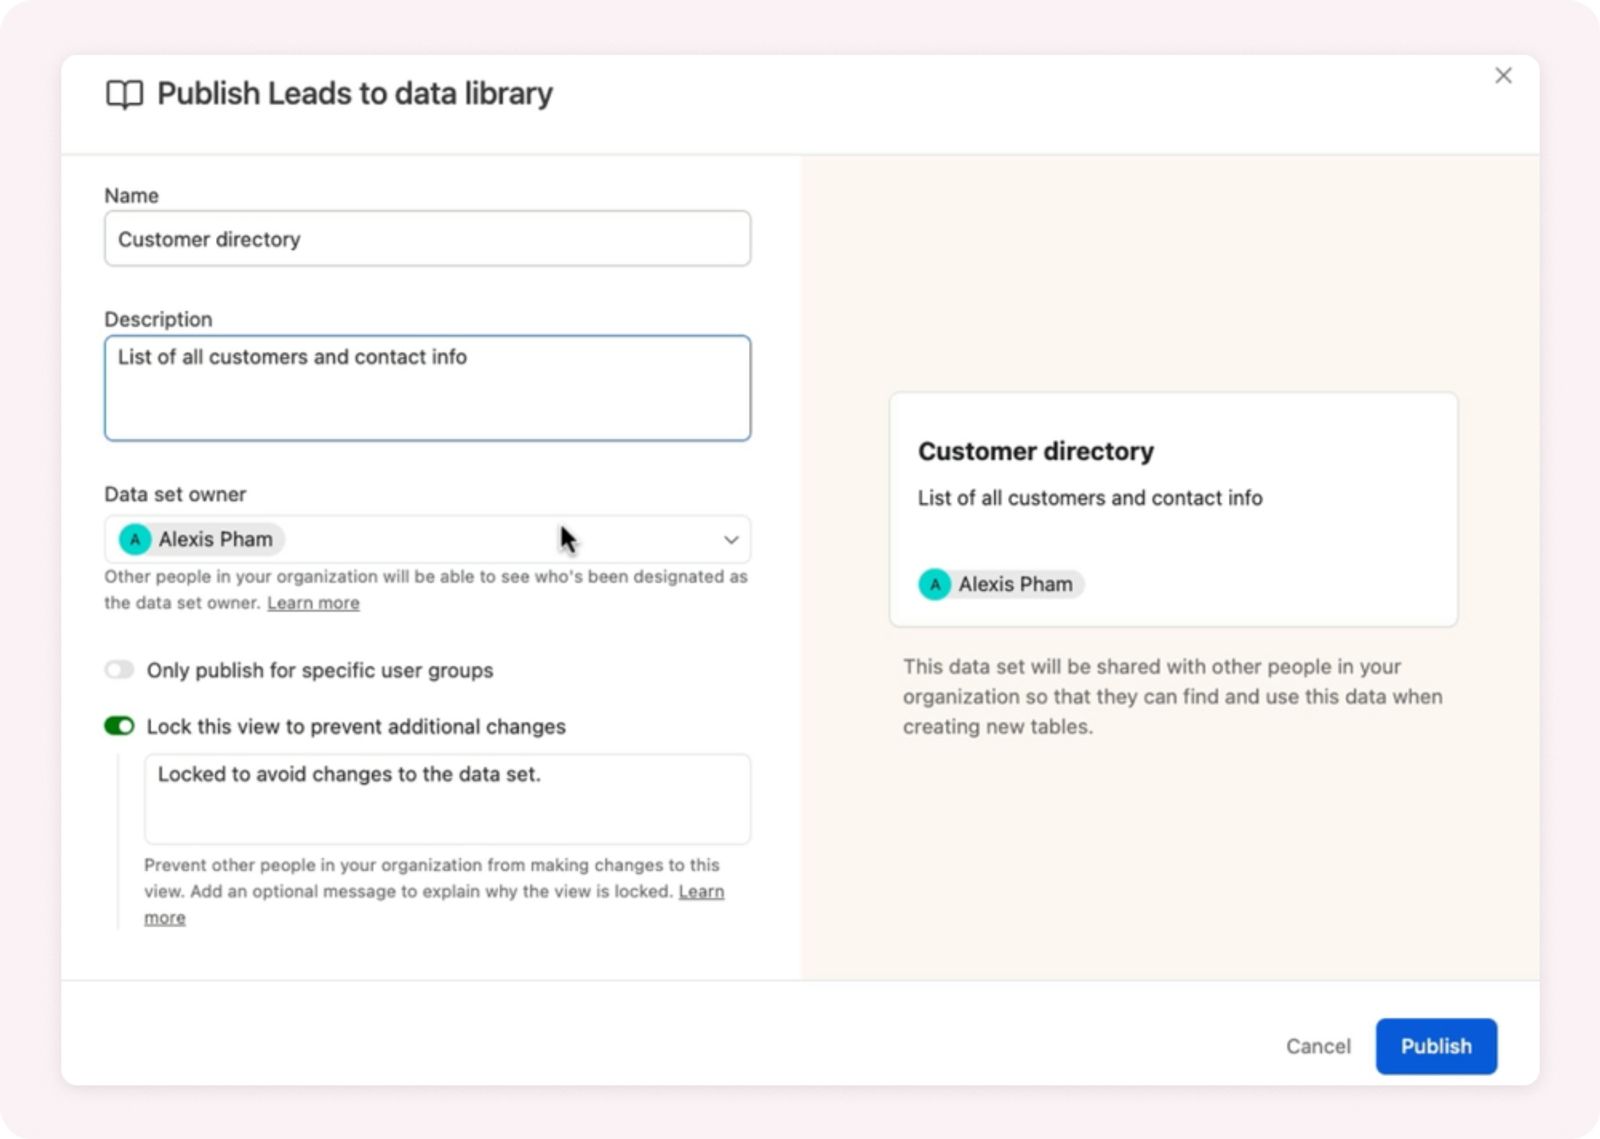
2. Publish the data set
Provide a name and description for your data set, assign an owner (yourself or another user), and choose the visibility settings. For data sets containing sensitive information, restrict visibility to specific user groups. For less sensitive data sets, you might allow access to all company members. Finally, click "Publish" to publish your data set. With your data set published, your colleagues can now access and use the data in their own workflows.
Pro tip: Can users publish a synced view already in use?
Yes, this is the recommended approach for popular data sets. Publishing an existing synced view doesn't impact current bases using it. And because the source base will now be listed in the Admin Panel, admins will have better visibility into the data.
Step 2: Administrators review data sets and decide whether to verify
Once a data set is published, administrators can preview it directly from the admin panel and verify it. Verifying a data set raises its visibility and indicates that it is your organization's vetted data set for a specific business area. Before deciding to verify a data set, an administrator should consider the following things:
- Accuracy: Can your organization trust the data set's correctness, completeness, and up-to-date status?
- Uniqueness: Are there other data sets that overlap with this data set? Should builders use this data set instead of others? Why or why not?
- Sensitivity: Is it appropriate for everyone in the company to access this data? If not, are there existing user groups in Airtable that should be allowed to view it?
- Relevance: Is the data set pertinent to your organization's core processes, beneficial for multiple teams, and valuable in achieving objectives?
1. Viewing published data sets
From within the "Data sets" section of the admin panel, administrators can view all published data sets in your organization. Administrators can view details such as the number of apps or bases using them; or whether the data set is accessible company-wide, or only to a specific user group or multiple groups. Additionally, they can see who published the data set, as well as who owns the data (this could be the same person, or different people).
2. Verifying a data set
Once an administrator has confirmed that a published data set is accurate, unique, does not contain sensitive information, and is broadly relevant to the organization, they can verify it from within the data library in the admin panel.
Step 3: Encourage organization-wide understanding and usage of verified data sets
Verified data sets help organizations boost workflow efficiency, simplify data management, and enable teams to collaborate effectively using accurate and dependable data sources.
Introduce verified data sets to your team members who build apps with Airtable, and show them how to locate and leverage these resources to accelerate their workflows. Share these straightforward steps to guide them in getting started:
1. Explore the data library
When creating a new base, browse published data sets in the data library instead of importing files, setting up new syncs, or manually inputting data. As long as you have Creator permissions in a base's data layer, you can click "Add or Import" to view available data sets beneath "Add from data library."
2. Choose a verified data set
The data library's complete list includes helpful information for selecting the appropriate data set for your workflow. Review the description and look for the "Verified" badge next to its name, indicating an administrator verified it and is suitable for company-wide use. Opt for verified data sets whenever possible to ensure data reliability and consistency.
Verified data FAQs
In this final section, we've gathered common questions about verified data to help you better understand managing published and verified data sets. For a deeper dive into the functionality, check out this support article.
1. What settings are needed to publish a data set?
To publish, users must activate a link and disable three settings: Two-way sync, Password protection, and view-level email domain access (org-wide domain sharing restrictions are acceptable). If a user enables one of these settings after publishing, the data set becomes inactive and requires sync settings reconfiguration to reactivate.
2. Who can view published and verified data sets?
Only organization members can view the data library when adding a synced table. While data sets are published to the entire organization by default, builders can restrict visibility to specific user groups while publishing or editing in the library.
3. As an administrator, can I control who publishes data sets in the data library?
Yes! You can enable the "admin only publish" option by accessing the admin panel. This feature ensures only administrators can publish data sets to the data library, giving administrators more control and oversight over the information builders share within your organization.
4. What additional controls do administrators have?
Administrators can filter data sets, export CSVs for an overview of all data sets, and manage inactive data sets. By default, any organization member with Creator+ permissions can publish data sets. If you'd like even greater control over what data is published, you can give these permissions to just administrators.
Try it now: Publish and verify your first data set
With verified data, organizations can empower teams to work efficiently and collaboratively from trusted data sources.
Start by publishing a valuable data set to the data library, and have an administrator review and verify its accuracy and relevance. Once verified, this data is primed for use in critical business workflows and decision-making processes.
By leveraging the power of verified data, your team is well-positioned to create connected apps that enhance efficiency, security, and ultimately, drive impact.

